Sunday, December 30, 2012
Resolutions 2013
Resolution time. This year I have so many things I should do that I can't decide on which ones to focus on. I have been working on simplifying my life, but for each step toward that goal, it seems like life takes me two steps back. Maybe I should work on not stressing over the little things- that seems more manageable. Life is too short to wear tight shoes!
Sunday, December 23, 2012
Bead room clean-up

Wednesday, December 12, 2012
Santas are out!

This is just a small portion of my collection. I don't plan on adding more because I am running out of space!
Tuesday, November 27, 2012
My kilns

 To make lampwork beads that will last,
they must be annealed in a kiln. Most bead kilns have a bead door
that you can open and insert your beads still on their mandrels,
which is ideal. Think about what you are going to use your kiln for
most of the time and buy the kiln based on that need. I am a fan of
buying a kiln for beads and a different one for fusing or PMC.
Sometimes trying to get one that will do all these things results in
none of them being done well.
To make lampwork beads that will last,
they must be annealed in a kiln. Most bead kilns have a bead door
that you can open and insert your beads still on their mandrels,
which is ideal. Think about what you are going to use your kiln for
most of the time and buy the kiln based on that need. I am a fan of
buying a kiln for beads and a different one for fusing or PMC.
Sometimes trying to get one that will do all these things results in
none of them being done well.
Think about whether you want (or need)
a digital controller. They raise the cost considerably, but are very
helpful in following your annealing schedule. For beads, the firing
schedule is relatively simple, but for complicated schedules for
fusing or casting glass, a digital controller makes it much easier.
If you happen to come across a really good deal on a bead kiln that
doesn't have a digital controller, you can buy one and install it
yourself, which is usually pretty simple. An important consideration is the
electric requirement. Most bead kilns can be simply plugged into a
household outlet, but larger kilns may need a dedicated 200 amp
outlet, so be sure to check the requirement of any kiln you are
considering. Generally, the bigger the kiln, the more amps it
requires to operate.
Another consideration is the type of
insulation in the kiln. Ones built with firebrick (these look sort
of like white bricks) will take longer to heat up to your working
temperature, and then will take longer to cool down to room
temperature- not necessarily a bad thing. A kiln lined with fiber
blanket heats up and cools off much faster. It cools off fast enough
that usually you must fire down (control the heat when coming down to
room temps) or your beads can crack. Many firebrick kilns cool off
slow enough that they can simply be turned off after an initial soak.
A firebrick kiln is more fragile and not very portable. Usually you
set them up and leave them there. Most of the toolbox type kilns use
fiber blanket, making them much lighter and easy to carry around.
These are ideal for beads, since you can easily put your beads in the
kiln with the mandrels sticking out, but they don't work too well for
fusing or PMC. After a lot of use, the fiber blanket will get mashed
down and may need replaced at some point. I have one I have used for
over 10 years, and while the blanket is much thinner than it was
originally, it still does its job just fine.

My first kiln was a large one I used
for fusing glass. It is a top loading kiln with elements in the sides and top and has a 36” diameter.
I tried using this to anneal my beads, but it didn't work because
the kiln lost too much heat every time I opened the door to put a
bead in. I could have used it for batch annealing- making a bead,
putting it in vermiculite or fiber blanket to slow down its cooling,
and then putting the room temperature beads in the kiln and running a
schedule. But there was a risk of beads cracking, so I bought my
first toolbox kiln from Don McKinny, pictured at the top. Unfortunately he no longer
makes them- it is my favorite kiln, hands down! It is for annealing
beads only, but I can get piles of beads in it.
 Then I decided I
wanted to try some casting, and I found a great deal on a firebrick
kiln that was for beads also. I thought that was a good idea- I would
have a back-up kiln for beads in case my toolbox kiln went down.
There was no digital controller on that kiln so I bought that
separately. I simply stuck the probe in the peephole in the kiln,
and programmed some schedules into the box. However I was having
some beads crack, and it finally occurred to me that the probe
reading the temps was 6-8 inches above the floor of the kiln. Since
heat rises, I thought maybe the floor of the kiln was too cool, and
sure enough, the floor of the kiln was 100 degrees cooler! So I
added 100 to the numbers in the firing schedule, and then it worked
fine.
Then I decided I
wanted to try some casting, and I found a great deal on a firebrick
kiln that was for beads also. I thought that was a good idea- I would
have a back-up kiln for beads in case my toolbox kiln went down.
There was no digital controller on that kiln so I bought that
separately. I simply stuck the probe in the peephole in the kiln,
and programmed some schedules into the box. However I was having
some beads crack, and it finally occurred to me that the probe
reading the temps was 6-8 inches above the floor of the kiln. Since
heat rises, I thought maybe the floor of the kiln was too cool, and
sure enough, the floor of the kiln was 100 degrees cooler! So I
added 100 to the numbers in the firing schedule, and then it worked
fine.
The most common problem with kilns is
the elements burning out, and if you are at all handy, they are not
difficult to replace yourself. Don't fire your kiln over the
temperature it is rated for, because that greatly shortens the life
of the elements. With a little care, your kiln will work for many
years!
Monday, November 19, 2012
Workshop on electroforming

Sunday, November 4, 2012
Two necklaces

Monday, October 29, 2012
Family photos

Sunday, October 28, 2012
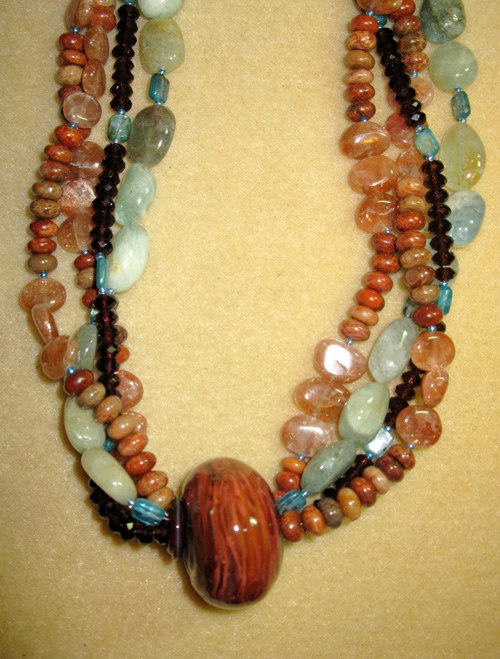
new necklace

Wednesday, October 17, 2012
Sick!
This month has been tough! I was either at a show or teaching every weekend so far, and I have not been feeling well. What started out as a nasty cold has morphed into a sinus infection, so I am taking antibiotics again and hoping I will feel ok by the weekend for yet another show. Especially this time of year, I have no time to be sick. I have not been able to work on my torch, or even put jewelry together, so I am really behind. Those of us who are self-employed really suffer when we are ill. No work, no pay. When I do feel better, I will be working overtime trying to catch up a little!
Friday, September 21, 2012
Time flies
Where did Sept go? My fall shows have started and several teaching weekends are coming up, which means it will be a while before I have a free weekend. I didn't get everything on my list done last month, and it won't be done this month for sure. Maybe starting my January to-do list would be a good idea.
People tell me it is good to be busy, and I totally agree. But a little down time would be nice too!
People tell me it is good to be busy, and I totally agree. But a little down time would be nice too!
Saturday, August 25, 2012
Keyring bead

Saturday, August 4, 2012
Black beads and pearls

Wednesday, August 1, 2012
Organizing beads

The cases on top are full of silver beads, silver findings, copper findings, etc. I could spend days and days sorting and organizing!
Wednesday, July 25, 2012
Millifiori weekend


Friday, July 13, 2012
Kutztown 2012


Wednesday, July 11, 2012
The Kutztown Folk Festival is over!
Sunday, June 24, 2012
Designing necklaces


It was hard, but I got out of my studio for a day and took a workshop on designing necklaces. This month I have been working overtime making beads and jewelry for the http://www.kutztownfestival.com, but the workshop came up, and I couldn't pass it up. Penny Diamanti, from Beadazzled, was the instructor, and the class was so inspiring! I have so many new ideas, which is exactly why I took the class. I had hoped it would push me out of my comfort zone, and it worked! The first photo was layer 1 of necklaces, and there were 3 or 4 more layers to inspire us.

Sunday, June 3, 2012
Panic time

I worked hard in May to cross items off my to-do list so I could concentrate on studio work this month, but fate is playing with me. Among lots of other things that keep popping up, I have jury duty on June 25. I will try to get excused from that. I am all for civic duty, but not 3 days before I set up for my biggest show of the year.
My pile of beads is growing and the boxes of my jewelry is filling. While I am torching, I am listening to Water for Elephants and really enjoying it. Now if I can just keep going until the end of the month!
Tuesday, May 29, 2012
Zentangle

Friday, May 4, 2012
Black blown boro beads


Stained glass

Friday, April 20, 2012
Serendipity, or kumihimo & beads

 Serendipity! I love it when things come together! Several years ago I
got hooked on kumihimo, a type of braiding, and I made a lot of necklaces.
Most were done with eyelash yarns (I love the texture!) and finished
into necklaces, and there were 4 of them still hanging around. Several
weeks ago I made some blown hollow boro beads and accidentally used the
wrong mandrels so their holes were much larger than normal. Last
night, lightening struck! The holes slid over the cones on the ends of
the necklaces, and some of the colors matched! I now have 2 new eye catching necklaces!
Serendipity! I love it when things come together! Several years ago I
got hooked on kumihimo, a type of braiding, and I made a lot of necklaces.
Most were done with eyelash yarns (I love the texture!) and finished
into necklaces, and there were 4 of them still hanging around. Several
weeks ago I made some blown hollow boro beads and accidentally used the
wrong mandrels so their holes were much larger than normal. Last
night, lightening struck! The holes slid over the cones on the ends of
the necklaces, and some of the colors matched! I now have 2 new eye catching necklaces!
Subscribe to:
Posts (Atom)


